


1001 Mountain Tips (Beta)
Tip: 700 - The Tump Line


Earlier this year, I started the long process of writing a follow-up to my hugely popular (and wildly translated) book 1001 Climbing Tips, which I wrote ten years ago. This follow-up aimed to make it less focused on pure technical climbing stuff, and more about mountain and wilderness stuff, so I could see a lot more! The book is still very technical, in fact, it’s probably the most technical mountain book ever written, only it’s technical about non-climbing stuff. At the moment, I’m up to 700+ tips, and what I've managed is really a lot of marginal gains stuff, which often make or break a trip, as well as some game changers. Like all my books, it’s very eclectic - but unapologetically so (who else could write twenty tips on how to set up a pulk?) - but has been written in a way that’s just as much stories as tips, the kind of book someone could read who never intends to ever visit a mountain.
At the moment, I’m unsure if I should just publish it or do it through Kickstarter, which is often a great way of creating some buzz (even if it requires weeks of copy and pasting addresses into Amazon!).
While I figure that out (tell me what you think), here’s a taster of the style of the book, the subject, the little-known, or understood, tump line.
Although modern technology can’t save you from ‘the load’, there is some old tech that can come to your aid, something very simple, but can make your load feel 30% lighter.
Rather than employ a million-dollar load-carrying robot, or a grumpy donkey, or a team of mutinous porters, just get yourself a strap, or to be more precise, a ‘tump line’.
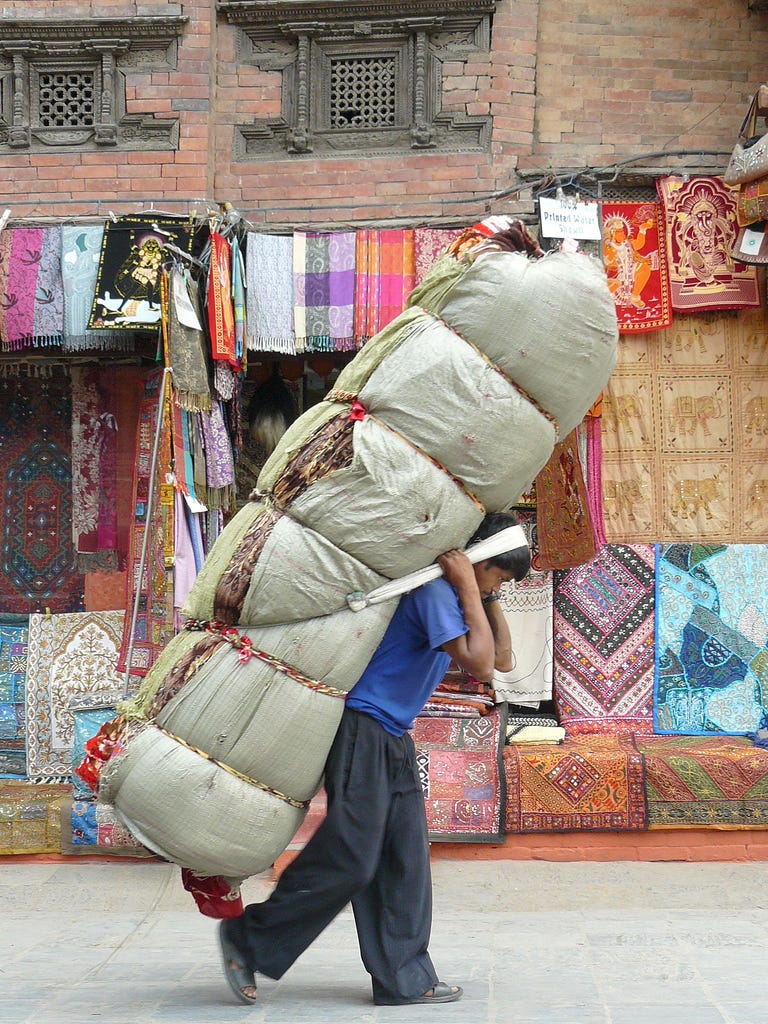
I guess I’d been aware of the idea of the tump line, or head strap, a way of carrying a load just on your forehead, ever since I’d seen pictures of Nepali porters, only, I’d never really thought much about it; I just thought they’d not invented shoulder straps.
The first time I actually thought seriously about the tump line was when I had a pizza with Yvon Chouinard (name drop), and he told me how he used one, and how great it was, only at the cost of never being able to look at the view. This sounded interesting, but not enough to try one, plus, I guess I didn’t want people to think I’d failed to discover the shoulder strap.
The turning point was my first post-50s (I was 53) trip to Yosemite Valley, where I climbed El Cap twice over the space of four weeks, one solo, and ended up doing a lot of load carrying, and I mean A LOT.
For each ascent of the wall, I had to carry over 100kg of ‘stuff’ (water being the bulk of it), to the base, which took four or five trips. Once I got to the top, it would take three trips to get it all down (necessitating 1000 metres of ascent each trip). Then repeat (that’s 6000 metres of ascent and descent just from the top.
Maybe due to my age, good sense, or the weight of gear needed on modern walls, much of the trip seemed to be about carrying heavy loads up and down El Cap, and the A4 walls were just a rest. Several times I felt my poor old body was rebelling, especially when I was spent, but still had to turn around and go back up for the last load. I’d actually had the same feeling not that long ago, when I’d been carrying my three-year-old son on my back, who weighed about 15kg, but when combined with all the other crap, and long days walking in the mountains, often left me knackered. I’d got to an age, it felt, when I no longer got stronger when I gave myself hell, but slowly weaker.
After the trip, I thought it was time to revisit this tump line thing, and so after doing some research, primarily from canoeists, who use them for portaging loads (the info is very limited), and the US climber Colin Haley, who uses one, I made my own (because I couldn’t find one for sale).
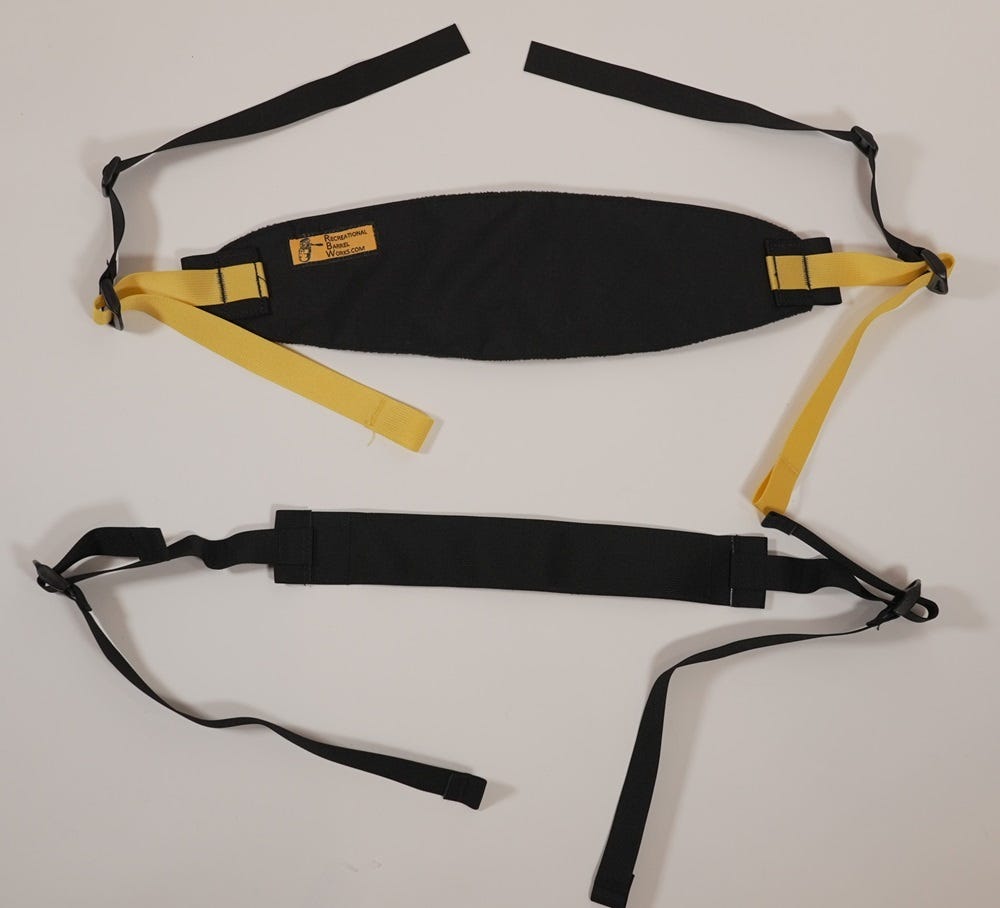
I could have made it from just a length of plain 38mm or 50mm webbing, or a head strap of 50 mm webbing, lined with fleece, and with long straps on either side, or a loop, but instead, I made mine out of a 3D mesh fabric sewn to an adjustable strap, long enough to go from my head to underneath the biggest bag I owned (150 litre haul bag). I used a Rollercam buckle on one side, positioned around hip height, so I could adjust the length when the strap was in place. This system worked well for beta testing the concept, but now I’d do it a better ‘way’.
All the testing I did on the tump line was carrying my daughter, Isla, who only weighs around 10kg, probably 15kg in her baby carrier, the weight being important, as your neck is only used to supporting the weight of your head (5kg or 7kg if you’re from Texas), so you need to start light and build up slowly.
The two key points are the position of the head strap on your head which tends to be adjusted during the carry, and the position on the load, which is fixed. For the head end, it’s best to start close to your hairline, if you have one, or at the transition between the forehead and crown. Note, the strap does not sit on top of your head, the reason being, that muscles can’t push (but limbs, being levers, can), only pull, and so by having it on the front of your head, you can apply your neck muscles to pull the load forward (try moving your head forward, and now try pushing it upward, and see how you do). If it was on top of your head (axial compression), all the weight would be on your spine.
The position on the pack is a little less crucial, but if you were to draw a line from the rear bottom out-facing seam, the one where the ice axe loops are usually sewn into, up to the forhead, that is probably the ideal, as this lifts the weight and both presses against your back, making it more stable. You could run the strap up from the base of the shoulder straps, but this would be less stable, or from the top of the shoulder straps, but this would be more ‘draggy’ on the neck.
An alternative is to run the strap under the axis point at the base of the pack (you might need to sew in a retaining strap for this.
One issue with the strap, when set this way, is that it’s easy to flop down or be misaligned or twisted when you pull on the back, leaving you to blindly fidget and fiddle. With practice, you tend to set it up each time, often tucking in the head section into the grab loop, so you can reach back and grab it.
An alternative, and a method often used by canoe packs, is to have a dedicated attachment point level with the shoulder blades, sewn into the side panel. This makes it easier to locate the strap. If you want to sew in such a tab, just place it along an imaginary line where a full strap would lie.
In action, the strap needs some adjustment to both create the right fit, but also to adjust the balance between the strap, shoulder straps and hip belt.
You put on the pack, then place the strap on your hairline, then, by shortening the strap and leaning forward, pressing with your neck muscles (you look down two metres ahead of you), you take more load on the strap. To reduce the load, you lengthen the strap, or move your head back (you can see where you are).
Very quickly, you can transform a very painful load on your shoulders to an almost painless one. You are not carrying all the weight on your neck, just enough to tip the balance back to something less excruciatingly painful (when carrying 50+ kilograms on your back, there is really only pain, and it’s more pain you can handle, and pain you can’t).
If you could measure these things, I think you’d find that even if you feel you’re carrying 90% of the load on your tump line (on your head), the reality is that the load is being shared between the line, your should straps, and also the friction between your aching back and the pack, which is magnified by leaning forward. Sometimes, you might have 90% of the load on your head, but mostly, that load will be constantly shifting, especially if you’re going downhill, or moving at speed. It’s for this reason that where the tump line rules is in slow and steady carries up steep terrain (thousands of mountain porters can’t be wrong), not in descent, where even a moderate load can be dangerous to your spine, due to the ‘bounce’.
Like any weighted exercise, it’s vital to increase the load in small steps to strengthen the muscles and the skills before you take on an expedition load. A canoeist might carry a big load, but most portages are short, and while a porter might carry 100kg loads day in and day out, such strength and skill take many years to develop. If you rush it it, your body could get broken.
In action, you’ll get the line on your head, and it will feel great, but there will come a point at which you will begin to feel the fatigue in your neck, at which time you need to either stop or transfer some of that load onto your pack straps.
In terms of strain, on the second day of using a tump line, although it felt OK, when I went to bed that night, in my half-asleep state, I wondered why my head felt twice as heavy as usual (really, my neck was just twice as tired).
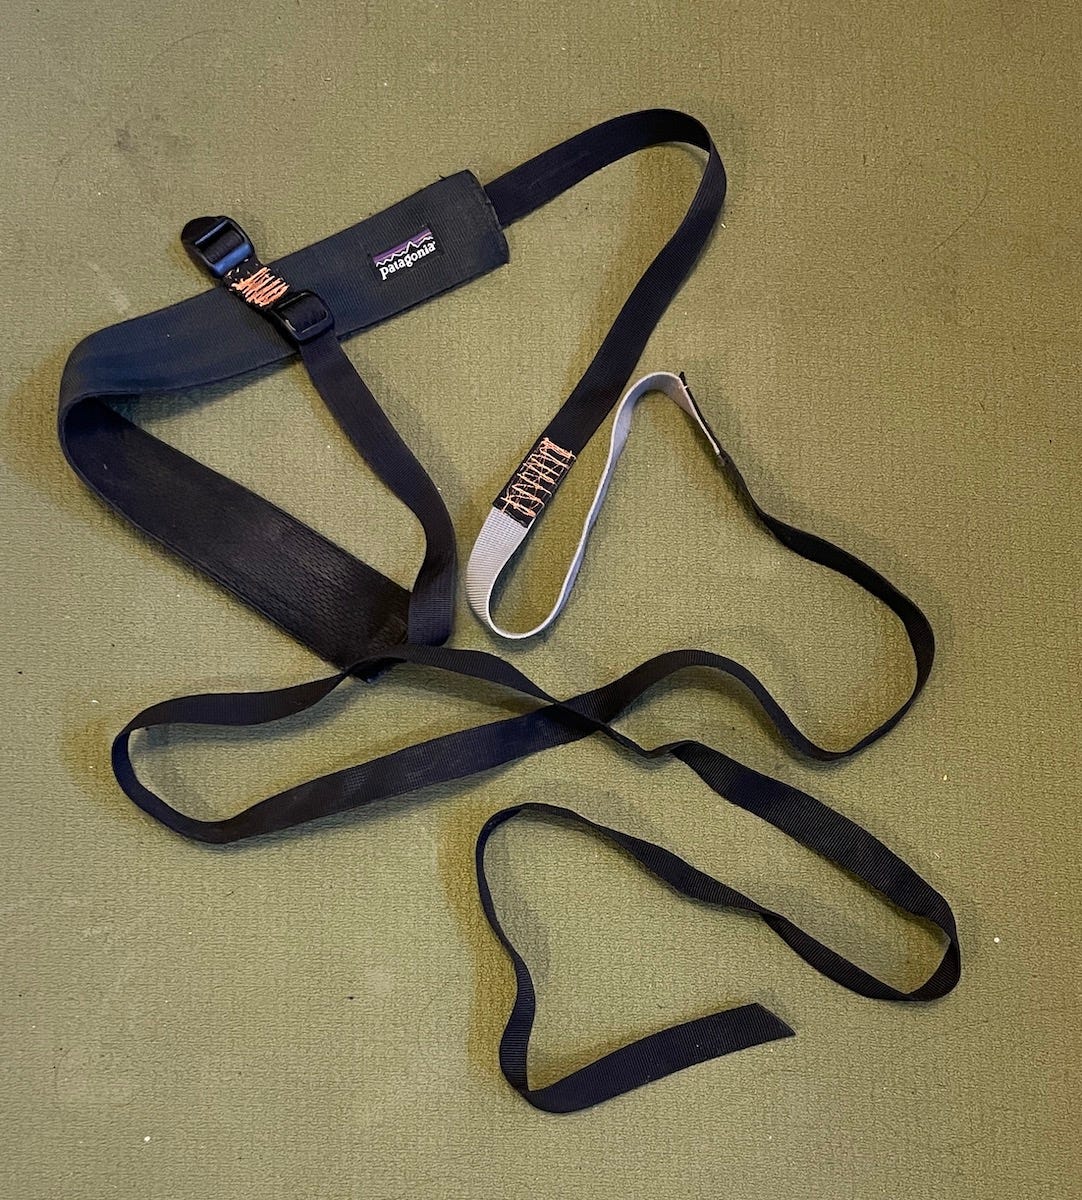
The main changes I have made to my tump line are to add high-strength fine-tuning ladder lock buckles (PL203H) on either side of the head pad part, so you can adjust the length more easily and unilaterally (so you can keep the pad centralised).
So, I view the tump line as a missing key to the game of moving loads, but like all simple things, it takes skill, care, and patience to use safely and correctly.
I too always wondered why they simply didn't use shoulder straps: "are they stupid?" My Privilege has been an amazing blindfold: cannot wait for your knew book