


Hand Bolting Part 2
Hand bolting gear

I’m not going to cover power bolting here as it’s beyond the realm of classic big walling, and instead focus on hand drilling. The beauty of hand drilling is the fact it’s a monumental pain in the arse, as well as hands, shoulders and biceps. This means that no one is going to go on a Warren Harding bolting bonanza and instead will keep bolting to an absolute minimum.
Bolting is an art, especially if you’re talking about the bolting of free climbs with power drills, but here we’re talking about big wall bolting, which tends to be hand drilled and kept as simple as possible. I will cover the tools for drilling first and then the bolts and rivets:
Drill Bits
The technology of rock drilling has advanced dramatically over the last few decades, with climbers in the past having to file and modify rock bits for hand drilling, some placements eating up several broken bits before a bolt could be sunk.
These days we have SDS bits that are ideal for drilling holes in rocks and better still are the ideal design to slip into drill holders. SDS bits come in many sizes, metric and imperial, and it’s VITAL that you match bolts to bits (for example, US bolts will not work with Euro drills). SDS bits come in long and short sizes and the short ones are of the most use to climbers, plus having your driver closer to the rock makes it easier when high stepping.

There are quite a few people making SDS bits but I would stick to Hilti and avoid cheap bits you find in hardware shops, or Chinese eBay bits as more often than not the carbide tip will just fall out! The best bits to buy feature an X style carbide (TE-CX) tip rather than a single carbide tip as this gives you more cutting power, and both SDS and SDS plus bits will fit any holder.
The wear rate of bits varies dramatically depending on the skill of the climber and the hardness or softness of the rock, but as a rough guide, I’d be conservative and go for one high quality 10 mm bit drilling 10 holes, although for some you will get five times that many out of it. Never have only one bit as they can get dropped, broken or stuck, so always have at least two in your bolt bag.
On a wall, your default bit is the 10 mm short SDS, as this will do you 10 mm bolts, emergency bat hook holes and drilled edges. For new routes, you will want to add 8 mm bits for rivets or 8 mm bolts, and drilled edges.
Modified Bits: In the past climbers would take standard high-speed bits (HSS) and file the tip to a chisel point, as a standard bit was pretty ineffective at chipping down into rock. This has continued for some, with the SDS bits also being modified, the aim to achieve a more effective and speedier bit. My thinking on this is that people like Hilti know more about drill bits than I do, and although hand drilling is not quite the same as power drilling, they’re manufacturing bits that balance out speed of penetration, low binding/sticking, and bit longevity. When you sharpen a bit to a chisel point yes you do get a faster hole, which could be important for bolting on lead, but the bit dulls much faster, and on a wall, you’re often not able to be filing and taking care of your bits. And so for general use, I would stick with high-quality unmodified Hilti TE-CX bits.
The Driver
The driver is the bit holder and handle for the drill, the bit inserted and locked in place by a sprung catch or sometimes a collar or Allen bolt. The holder tends to have a rubber grip that helps in twisting and protects your hand from the hammer, as well as having some way of attaching the driver to yourself via a wrist loop (this loop should always be clipped into a keeper sling /cord). The driver tends to feature a steel insert in the handle as a striking surface to stop the end from becoming deformed, and there is often a little play in the bit to help the bit ‘bounce’ as it’s struck.

All SDS bits feature a universal base diameter meaning one bit should fit into any holder, and the Petzl Rocpec driver also features an insert that allows an 8 mm self-drive bolt to be used as well.
The D5/Hurricane driver is a high-quality driver that also works with SDS style bits, but will also work with standard imperial HSS bits via steel collets, making it perhaps a better drill for travelling to countries where high-quality SDS bits might be problematical. The downside is the D5 requires a spanner, while the Rocpec does not.
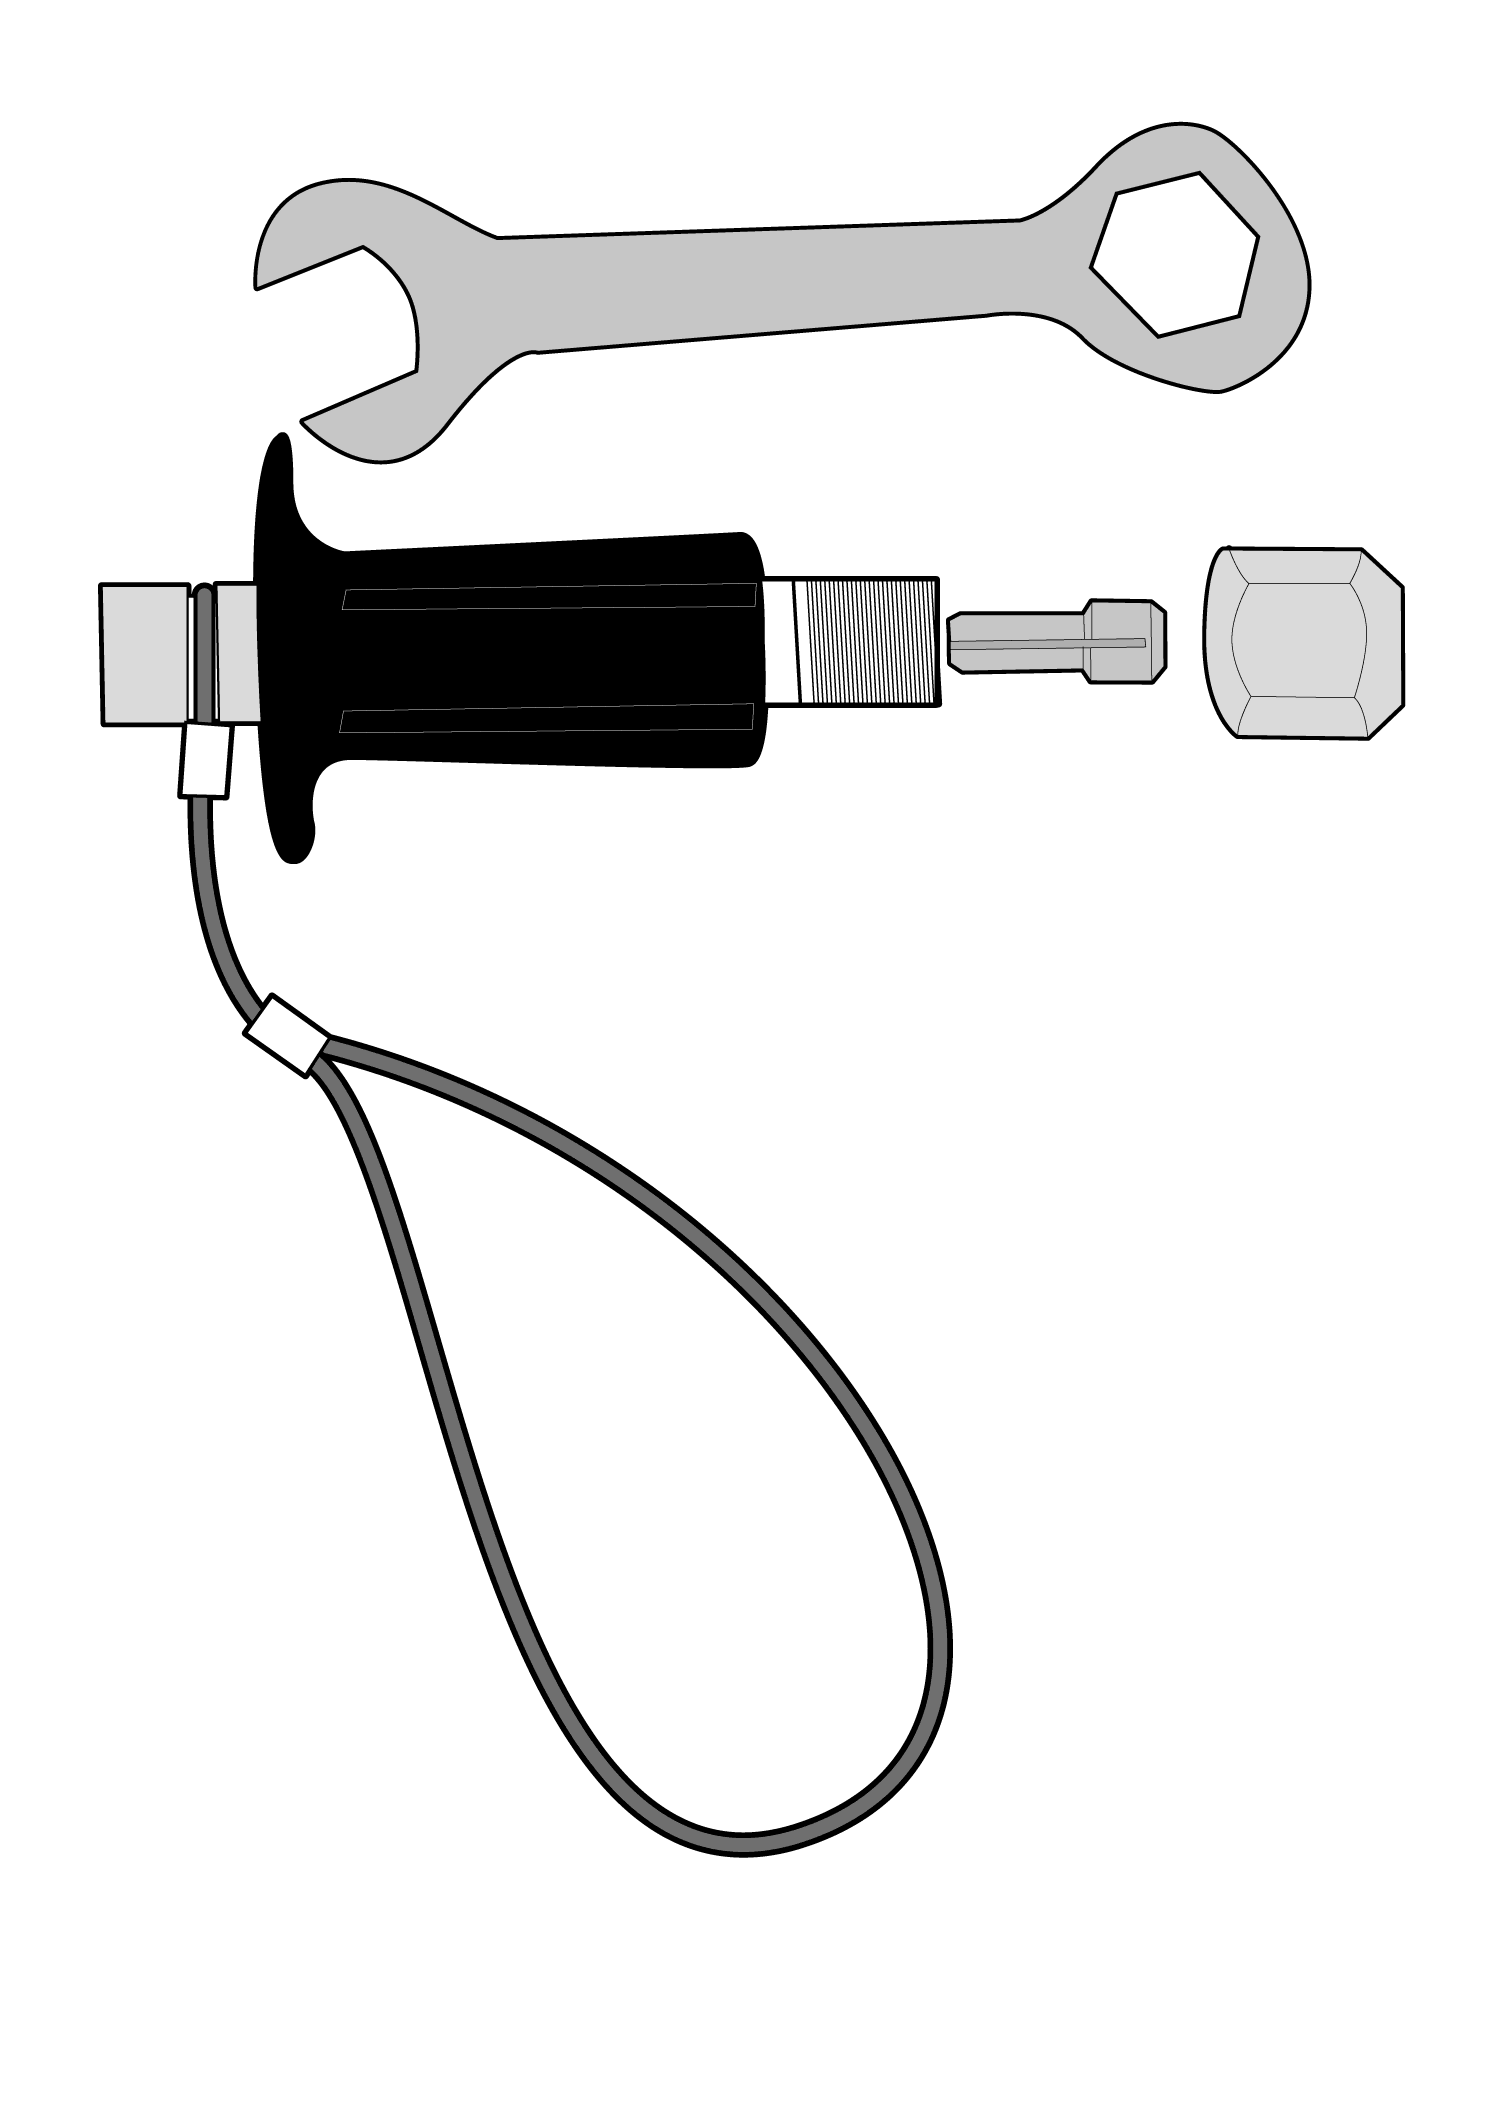
Blow Tube
This is used for blowing the dust out of your holes, and although not vital is good to have, especially if you’re using longer bolts in soft sandy rock. This tube tends to be a short length of flexible plastic tubing that is narrow enough to fit in your bolt holes. Make sure you tape a clip loop on your blow tube so you can keep it close when drilling.
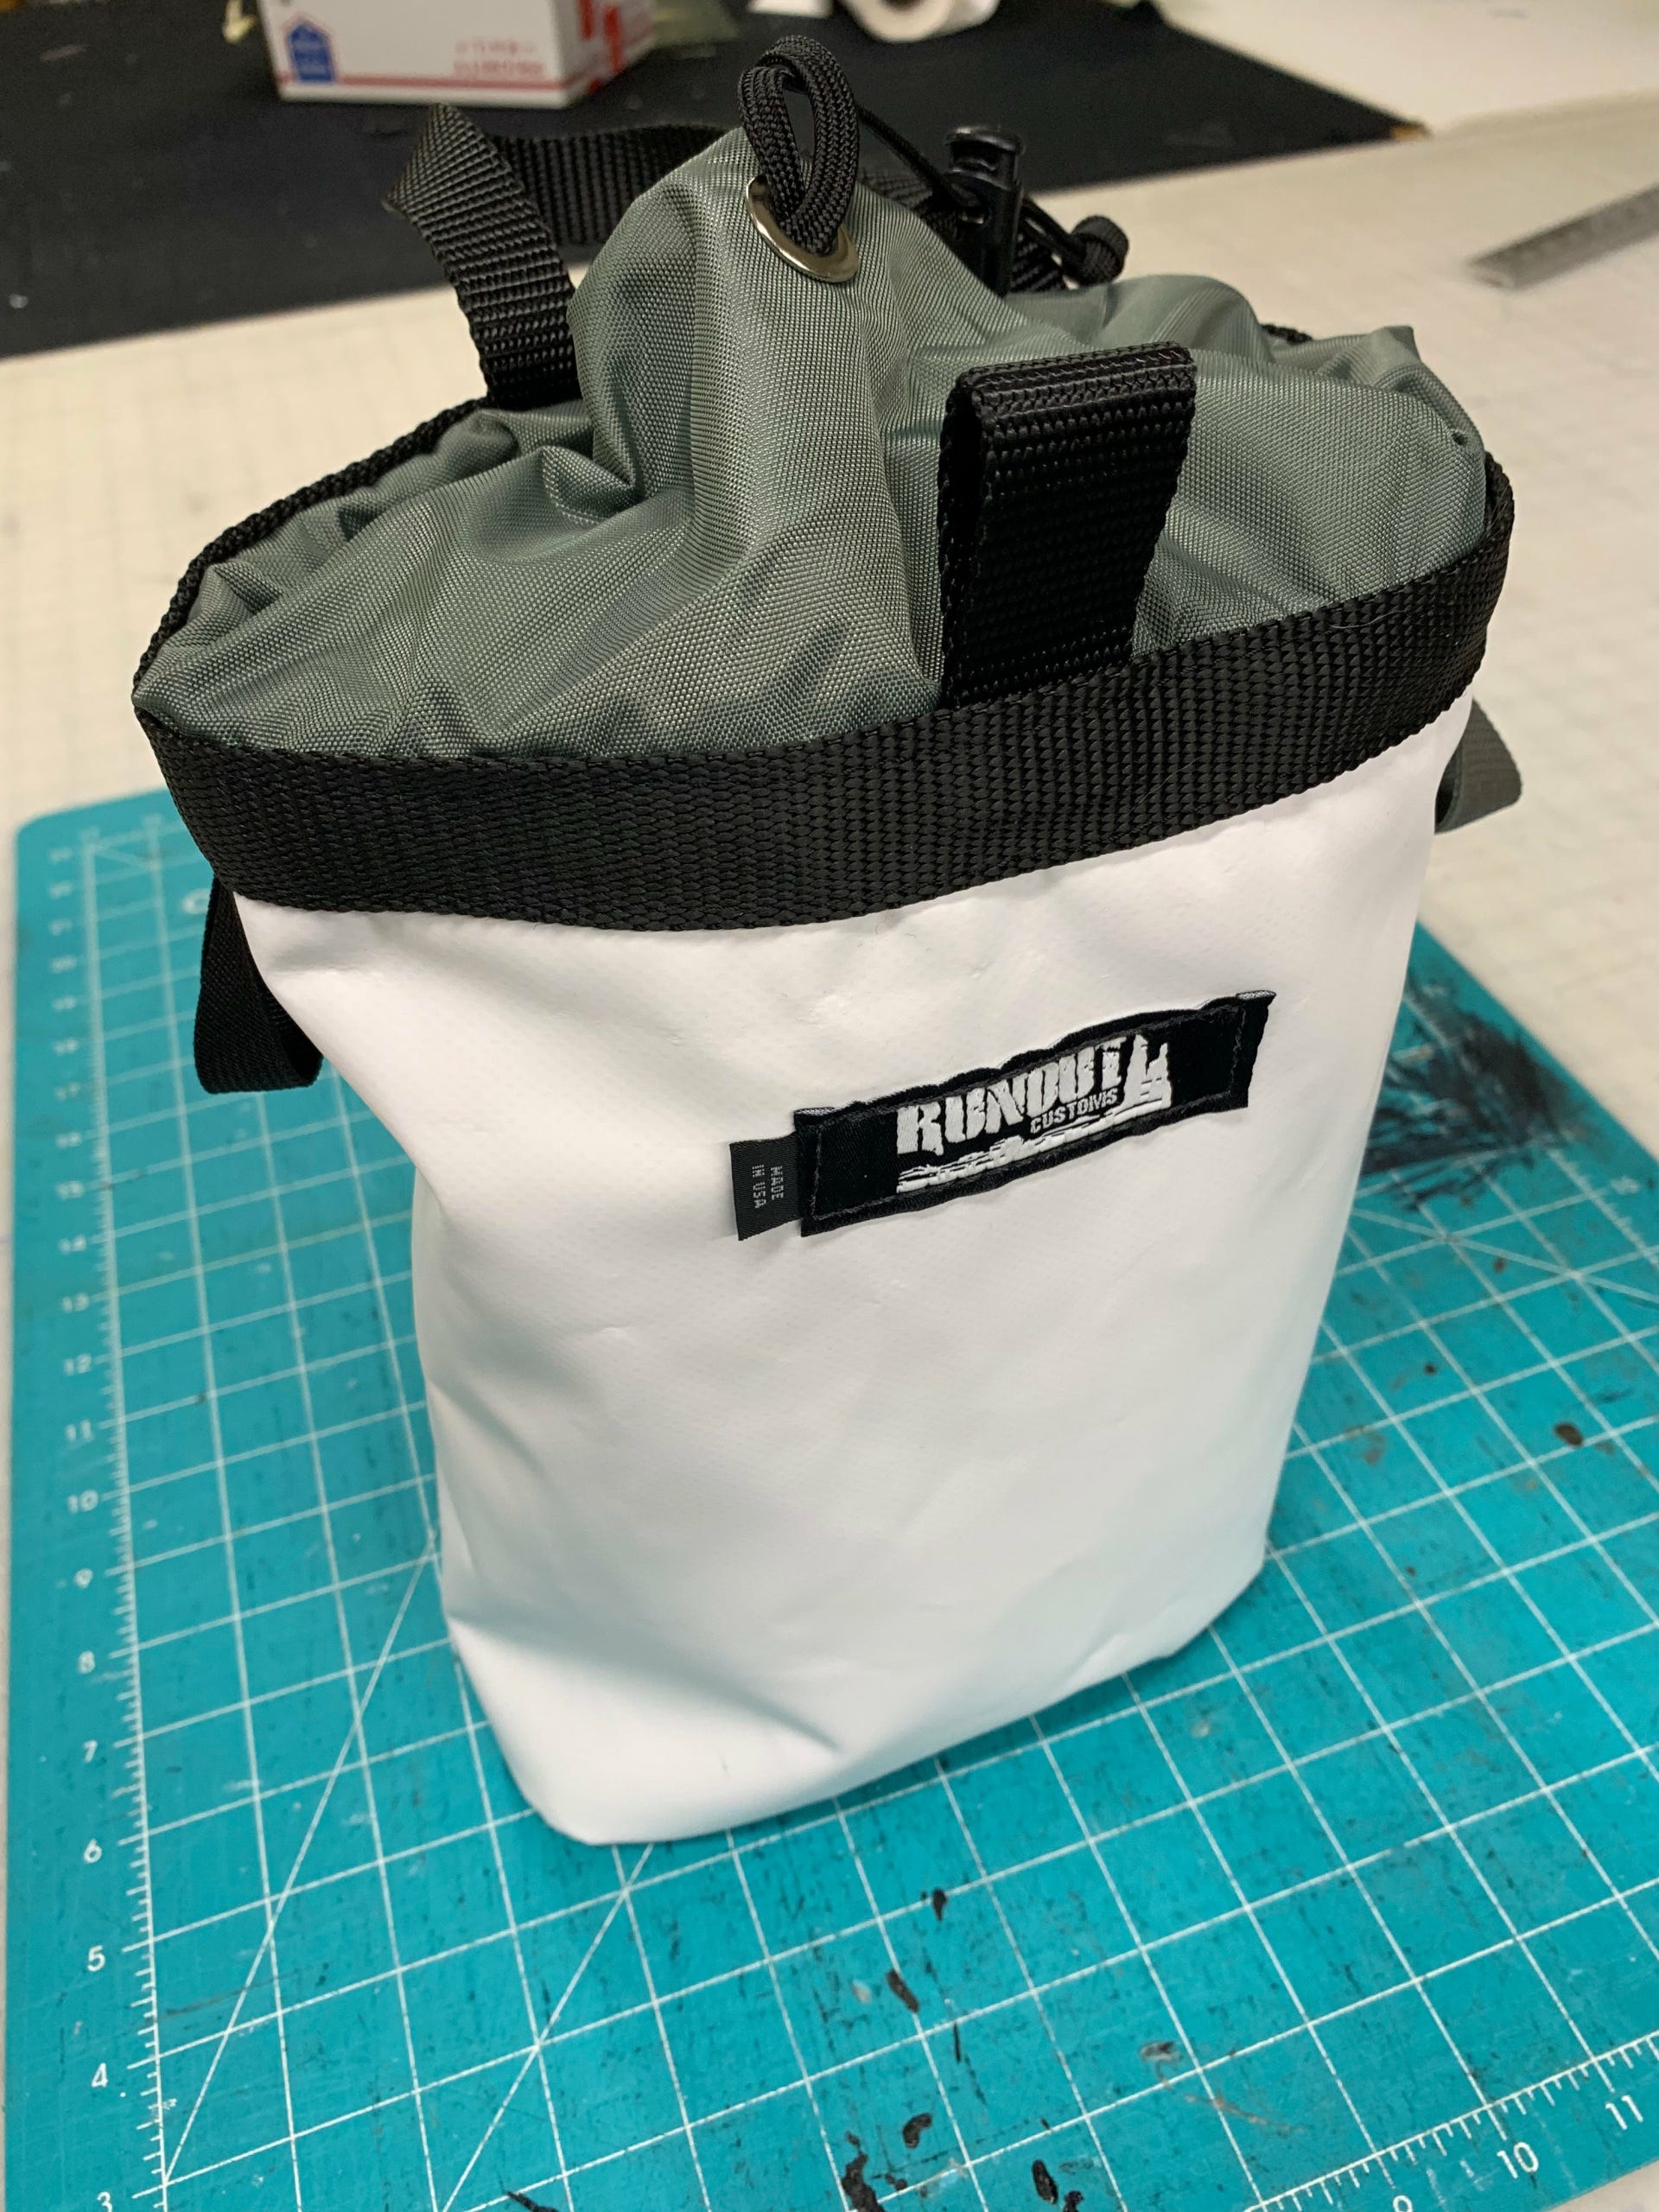
Bolt Bag
This is an important piece of kit and holds your bolts, hangers, driver, blow tube and bits. This should ideally be a bag designed for purpose (Yates make a very good bolt bag, with Petzl and industrial companies offering other designs), featuring a bomb proof clip loop, one-handed draw closer, internal pockets and bit holders. Attaching a long cord or sprung leash from your bag to your driver can reduce the risk of dropping it, and any drill bit changes are best done with the driver inside the bag. Bolts and hangers are best separated into stuff sacks inside the bag, with only enough carried for the day’s climbing if doing a new route.
Hammer
I’ve covered hammers elsewhere and I guess it doesn’t need saying that a hammer is an important part of drilling holes. Some climbers think a very heavy hammer is needed for bolt drilling, but I find a medium hammer works well and is less tiring, which is vital when drilling high above your head.
Spanner
You will need a good-sized spanner that will allow you some torque on the bolt’s nut, and make sure it has a lanyard taped to it so you don’t drop it. If you drop your spanner then bolts can be tightened by hand but view these pieces as passive protection until you’re able to tighten the bolt.
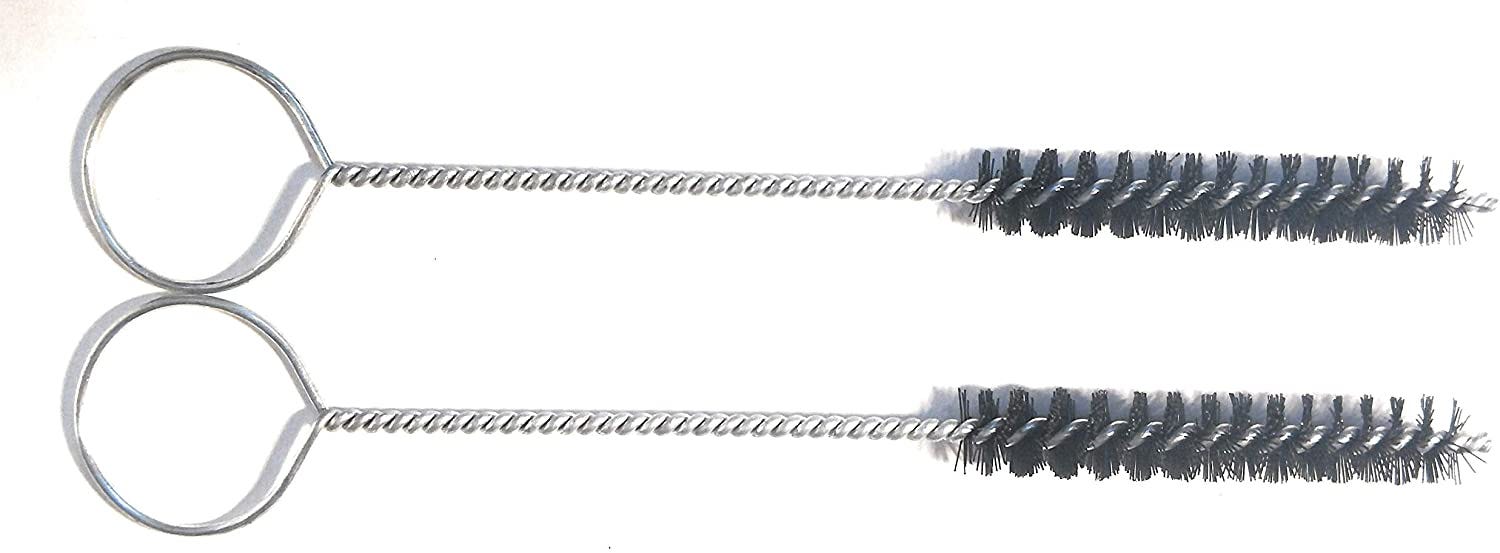
Brush
A small stiff brush designed to clean out drilled holes is worth carrying if you want to do a good job, with the Fixe bolting brush being a good example.
Spares
Always carry spare nuts, washers and hangers (stainless), as well as some rivet hangers and wire cinch hangers (thick and thin). These should be both metric and imperial. I would carry one of each of the following nuts threaded onto a piece of cord; 8 and 10 mm, 1/4, 3/8, 1/2. Another piece to carry is a Petzl 8 mm ’ Vrillee’ self-drive hanger as these are often found on belays for portaledges or as chicken bolts (there is one on the triple cracks on the Shield), although they can be hard to spot, as the hole is flush to the wall. Removable bolts (Russian or Petzl) may also be worth carrying if teams have used these in the past.
HARDWARE
The bolts a climber might place on a big wall may be different to the bolts a climber may place on a sports climb. The reason for this is that a big wall will get very little traffic, in fact a sports route might get more ascents in a day than a big wall climb gets in a year, or a century!
The standard for bolted sports routes is the glue in bolt, which will last for hundreds of years, and after that the 12 mm five-piece bolt, both able to handle endless use without degrading. But these bolts are always placed using power drills, not by hand, and with the gear and conditions needed to place them perfectly (they are rarely placed ground up).
On a big wall you’ll be placing a bolt by hand and often in extreme situations, maybe while hanging on some skyhook or funky head, and so you don’t have the time, the energy, or the balls, to drill a solid 12 mm five-piece. Instead, you go for super strong hardware, but hardware that’s appropriate to the climbing, lighter and quicker to place, and still lasting for a hundred years, but only for routes where the traffic will be light.
I’m going to cover the primary bolts that may be in your toolbox.
Bolts - Hard Rock
These bolts are suitable for granite, quartzite or limestone.

10 mm Stainless Stud Bolt Short (66 or 70 mm)
Although you can place 12 mm bolts, such bolts are best saved for trade routes that get tons of traffic, where many rescues take place, and people have the time to drill them. For everything else, the 10 mm stainless expansion bolt is the default belay and lead bolt, being very, very strong and long lasting.
The basic concept for anyone who’s not seen one of these is that you drill a 10 mm diameter hole to a depth halfway down the threaded section of the bolt, insert the bolt, place on its hanger and nut and tighten. As you tighten the bolt the expansion collar binds on the bolt’s shaft and locks it in place. In good rock, this provides a very strong anchor suitable for the highest loads.
Usage: Belay and lead bolts
Strength: 25 kN (15 kN pull out)
Drill Bit: 10 mm SDS
3/8 Powers Power Bolt Short (2.4 inches)
This is the standard US big wall bolt, and is both high strength and long lasting, and easier to remove when re-bolt- ing, although I expect these bolts will last 50+ years anyway. When using powers bolts you should always use the washer, placing it between the hanger and the nut.
Usage: Belay and lead bolts
Strength: 20 kN (21 kN pull out)
Drill Bit: 3/8
8 mm Stainless Stud Short (50 or 55 mm)
This is what I view as the modern ‘alpine’ bolt, or modern rivet, being very light, small and compact and quick to drill, while still providing a good level of protection on lead (10 kN which is the same as a climbing nut). Unlike self-drives or button heads the quality and component parts of these bolts is assured and will last for a very long time if matched to the correct stainless hanger. If alloy hangers are used on an alpine wall then these should be removed to avoid corrosion, but a Moses Stainless steel hanger only weighs 24 grams, meaning bolt and hanger weigh only 50 grams, so just do the job right.
Usage: Lead bolts and rivets
Strength: 10 kN (10 kN pull out)
Drill Bit: 8 mm SDS
Petzl Pulse 8 mm Removable Bolt
Removable bolts have been around for a long time but they have either been inappropriate due to the need to drill a deep 12 mm hole, or in the case of non-commercial designs, because they either fell out or broke while being used, or became fixed when loaded!
The Petzl Pulse is the first practical removable big wall bolt, and is a game-changer for big walling, the 8 mm hole being easy to drill and the bolt itself being high strength.
The removal of the bolt removes the problems of both corrosion and basic wall junk, and offers the chance of having a virgin pitch free from rivet heads and hangers. Being full strength you can get high on these pieces when drilling rivet ladders (which would become hole ladders), with a small rack being used both for protection and progression.
The downsides with such removable bolts are that if you were to retreat you would need to use up your supply of bolts, plus you will need to supply a detailed description of pitch lengths and bolt counts, as finding empty holes can be a very tricky business, especially under snow and ice.
Personally, I would stick to 10 mm bolts for belays and use these for lead bolts, hanging portaledges, and rivet ladders.
Usage: Lead bolts.
Strength: 15 kn
Drill Bit: 8 mm SDS
Bolts - Soft Rock
In softer rock a longer bolt is advisable, and by long I mean as long as you can get (a glue-in is the ideal but you’ll not have that option on a big wall) as the surface strength of soft rock can be very poor, especially if saturated. In very soft rock even these bolts may fail to lock in place, the rock compressing instead of the expansion sleeve, meaning the bolt is ‘wobbly’ and may even be pulled out with the fingers, creating a torque anchor little better than a drilled angle (where a hole is drilled and an angle peg is hammered into it). The difference between a long 10 mm stainless bolt and a drilled angle is the bolt will retain its strength much longer. All bolts in sandstone should be viewed as highly suspect, no matter how much of a trade route you are on, and so should be equalised and backed up with cams and nuts.
12 mm Stainless Expansion Long (100 mm+)
Usage: Lead bolts and belays
Strength: 30 kN (28 kN pull out)
Drill Bit: 12 mm SDS
1/2 Powers Power Bolt Long (3.75 inches)
Usage: Lead bolts and belays
Strength: 30 kN (26 kN pull out)
Drill Bit: 1/2 SDS
BOLT HANGERS
Bolt hangers come in many styles but if you’re using a mixture of sizes then you can use a larger hanger on a smaller bolt, meaning carrying 10 mm hangers for both 10 and 8 mm bolts, but using a washer if you have to put larger hangers on smaller bolts.
Walls can often take years to get a second ascent and so I would also always add a washer in between the hanger and nut to give it that extra little grip, and always check hangers are tight when climbing. Standard twist hangers are the style mostly used on walls, with bolts placed on belays either left plain or if you think it’ll become a trade route you can have ring hangers or leave maillons fixed to them.
Overloading hangers can be an issue and Raumer make a twist hanger for aid climbing and big walls called the Alien (27 kN / 57 g), that features two clip in holes rather than the normal single clip in point.
Lightweight Hangers
Most hangers are made for either industrial applications or for decades of intensive use, able to be fallen on perhaps a hundred times a day for years on end. On a big wall you may only see an ascent once a year, or even less, meaning that a full weight 33 kN hanger, three times the strength of the bolt it’s hanging from might be overkill. Lightweight hangers for 10 and 8 mm bolts, often described as being for caving or canyoneering, are ideal for big walls. For example the Petzl Coeur 10 mm hanger (22 kN) weighs in at 65 g while a Kop De Gas Montsec 10 mm (20 kN) hanger weighs only 20 g, meaning a saving of 900 g if you carry 20 hangers in your bolt bag, a significant amount if you’re carrying it.

SELF DRIVES (SPIT)
Self-drive bolts are a dying breed of bolting tool. Designed originally for caving they are an integrated drill bit and bolt, a toothed point chipping away the rock surface until the whole bolt is buried into the rock. At this point the bolt is removed and a cone inserted into the end and tapped home, expanding the bolt’s tip and locking it home, at which point the driver is removed and a hanger replaces it. The most widely used self drive is the Petzl Perfo Spe matched with the Cheville Autoforeuse 8 mm bolt.
This is a very simple and light system and was the default method for decades on alpine walls. The system is fast (I can drill a self-drive in 10 minutes in limestone) and light and easy to master, with all the parts cheap and easy to buy. The only problem is that the bolts themselves are shit!
The combination of steel bolts and alloy hangers means they corrode badly, and I’ve seen self-drives that literally flake to dust when you go to clip them. They are also weak (some have pulled out at 3 kN), the actual integrity of the bolt down to an 8 mm nut that only screws into the body by about 10 mm. The cone system is also problematic, as in soft rock you can fail to achieve full expansion, and I’ve placed self-drives in poor rock that could be pulled out by hand and were only held in place by torque of loading.
One major risk when drilling with these self-drives is that if the driver becomes untwisted just a few turns (easy to do), you can snap off the threaded tip of the driver, rending it and all your bolts worthless (unlike an SDS system).
As you can guess I’m not a big fan and would like to see this system disappear mainly as it’s just not future or climber proof.
Usage: Belay and lead bolts
Strength: 15 kN (0 kN pull out)
Drill Bit: The bolt
Part 3: Drilling the hole.